
 English
  Français
And here is already the second tutorial, dedicated to the discovery of Pygame in Python! 😃
For this new step, we will display a sprite sheet! 😇
But what is a sprite sheet? 🧐
In the video game industry, it is the set of sprites that constitutes the animations of a 2D character, such as the animation of immobility (Idle), walking (Walk), jumping (Jump), double jumping (Double Jump) or death (Death). We can still add others depending on the richness we want to bring to the animations of our game (but be careful, too many animations can kill the gameplay - just look at some Infogrames games to be convinced... 🤑).
Normally, we don't display our entire spritesheet on the screen but we cut it up to manage our animation 👀. That said, since we're going to do it step by step, we're going to display it in full first before cutting it up, in the following chapters! 🤩
This is what it should give us, superimposed on our magnificent background 😹 from the previous chapter:
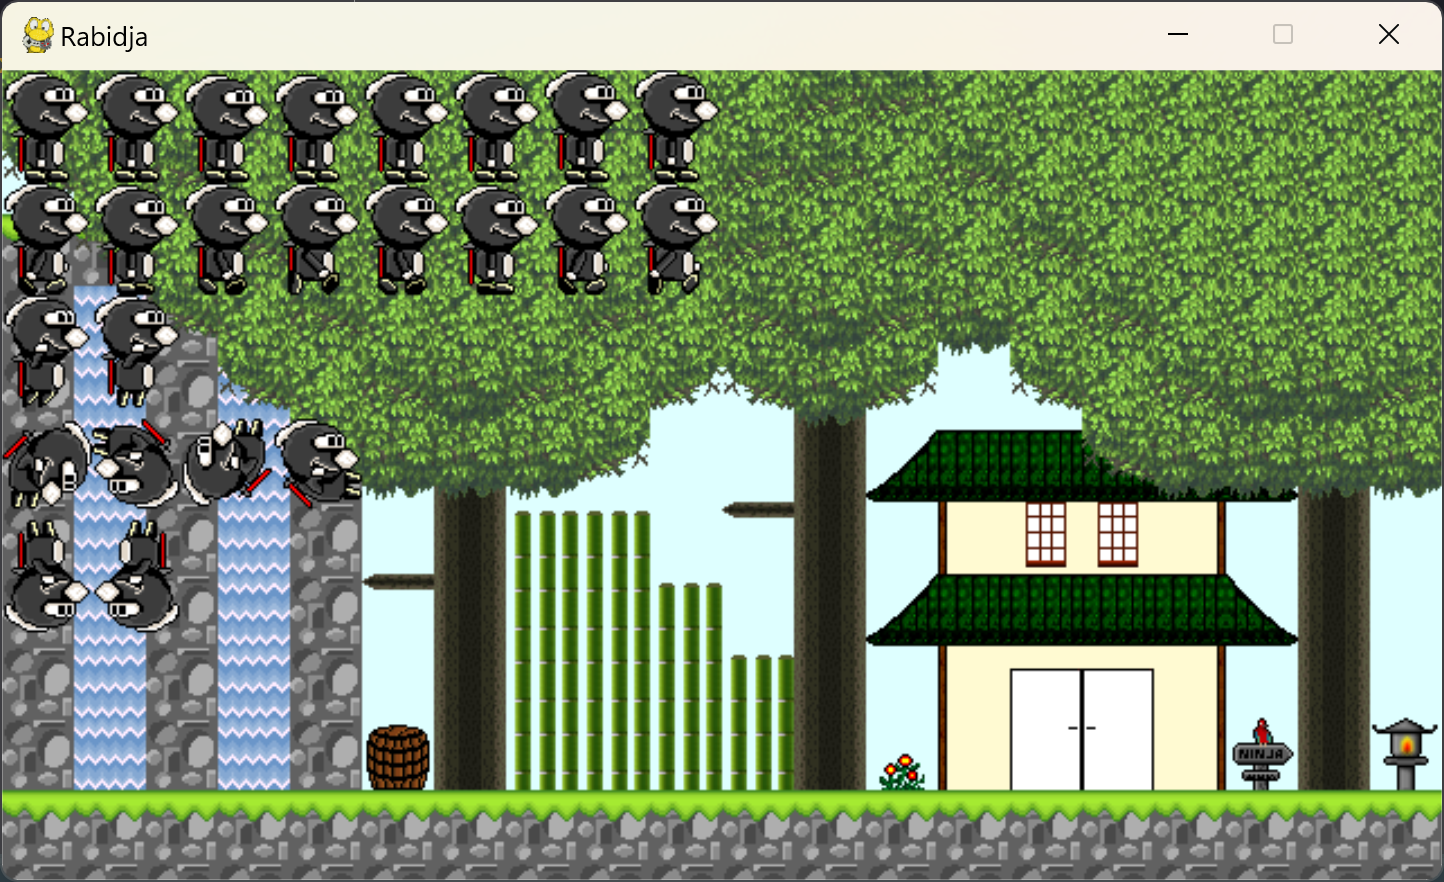
Now, we will add our spritesheet "rabidja.png" to the "graphics" folder :
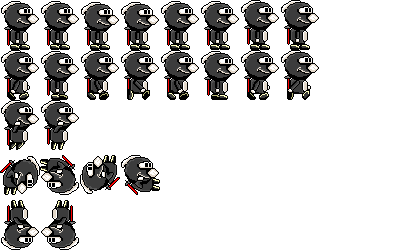
rabidja.png
We will now create 2 new empty Python files called Constants.py and Player.py (just open a new file and save it under this name 😉):
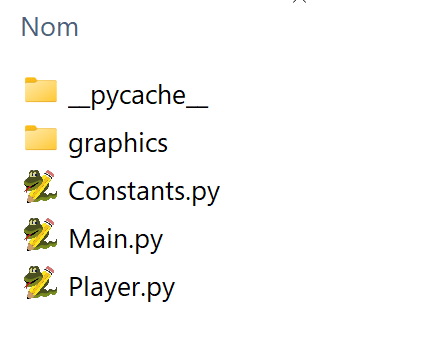
But why do we have 3 files now? 😱 What will that be for? 😳
It's true that until now, our Python programs were very short and we didn't need to have several files. But you can imagine that if you program an open world video game, you will quickly end up with hundreds of thousands of code lines. 😱 Imagine the mess, if everything was in bulk in a single file! 🤢 It would quickly become unmanageable! 😰 That's why, in the industry, we separate our code into several files, each managing a specific aspect of the program. 😎
Here, we add two files:
- Constants.py which will contain all the constants of our programs, that is to say the predefined values (such as the WIDTH and HEIGHT of our window). Like that, if one morning we wake up wanting to change the value of a constant 🤩, we will only have to change it ONCE in this file rather than struggling to find ALL THE TIMES we used it in the code... It's still better, right?... 😇
- Player.py which will be responsible for managing our Player / Player . This is where we will put the code to display and manage Rabidja's movements.
This way, it's much easier to find your way around. 😉 And if there's a bug, you know where to look at! Speaking of bugs: to avoid them, a good practice is to write just a small piece of new code and then test it to see if it works (when possible of course 😉). This way, if a new bug arises, it will necessarily be the fault of the last piece of code entered. 🧐This avoids searching too much! ☹
Now let's move on to the source code of the Constants.py file ! 🤪
File: Constants.py
# Created by Jay81, on 06/16/2024 in Python 3.7 """Game constants""" #Window settings WIDTH = 640 HEIGHT = 360 #Window customization TITLE = "Rabidja" ICON = "" #List of game images (graphics) BACKGROUND = "graphics/background.png" SPRITE_PLAYER = "graphics/rabidja.png" # State machine RIGHT = 1 LEFT = 2 JUMP = 3 |
As you can see, the code here is quite transparent. 👻 We create variables that will be used in our code as CONSTANTS . We define the dimensions of our window (640x360 pixels), the TITLE of our window: "Rabidja" , and we do not load an icon for now. We then indicate the location of our two image files (to change if you put them elsewhere, because you did not follow anything! 😡). Finally, we create a very simple state machine for our hero Rabidja. 😊
Wait! 🤔 But what is a state machine, again? 😨
The principle is easy. We record in a variable the state of our hero according to what he does and where he is, and depending on that, we will know how to manage and animate him! Here, in our example, our hero will be able to either: look RIGHT , LEFT and / or JUMP . But this will become clearer later. 😋
Now reopen the Main.py file which contains the code from the previous tutorial and add/edit the code below which is NOT grayed out . Let's go! 😎
File: Main.py
# Created by Jay, 06/16/2024 in Python 3.7 # Import pygame import pygame from pygame. locals import * |
And there you have it! Now we will explain these changes step by step.
First, we need to import the Constants.py and Player.py files so that the program knows that it must include them during compilation (it won't guess it by itself... 🙄). You will notice that it works the same way as for our pygame library. 😉
#Import game constants and classes from Constants import * from Player import * |
Then, we mainly make modifications, replacing the values that we had put in the previous chapter with their equivalents in the CONSTANTS . We thus replace them with WIDTH, HEIGHT and BACKGROUND.
Note that we also add the line of code that allows us to define the TITLE of our window using the set_caption function of Pygame. 😉
# Open the game window in 640 x 360 pixel resolution window = pygame.display.set_mode(( WIDTH , HEIGHT )) #Title pygame.display.set_caption(TITLE) |
The next two lines to change will actually call our new Player.py file that we will implement right after. You will understand better, once we have seen it. 🤪
First, we will tell the program to create a player by calling the Player() method/function that we will see below. 😉
Note that:
- player = a variable
- Player() = a method or function, that is, a piece of code that will be executed.
Above all, don't mix everything up! 😨
#Creating the player player = Player() |
Then, in our infinite loop , we add the display (blit) of our spritesheet, a bit like the wallpaper previously. As arguments (the stuff in parentheses 😜), we send it player.sprite which will contain our spritesheet (image) and the coordinates where to blit (display): player.x and player.y. But we'll see that in the Player.py file ! 🤩
Be careful NOT to INVERT the display of the background and the sprite sheet, otherwise, the spritesheet will be covered by the background and we will NOT see it ! 😱
# We display the sprite window.blit(player.sprite, (player.x, player.y)) |
And there you have it, now let's move on to our last file! ☺️
So open Player.py and copy the text below:
File: Player.py
# Created by Jay81, on 06/16/2024 in Python 3.7 # Import from pygame import pygame from pygame.locals import * #Import game constants and classes from Constants import * class Player : """Class for creating a character""" def __init__ ( self ): # Loading the sprite file self.sprite = pygame.image.load(SPRITE_PLAYER).convert_alpha() # Sprite coordinates self.x = 0 self.y = 0 # Sprite Direction self.direction = RIGHT |
For now, it's quite short because our player doesn't do much... 😬
Remember, we just display our spritesheet! 😉
Well, you already know the beginning. 😉 As for the main program, we must import Pygame and our Constants. It is very important to do this in EACH FILE otherwise, we will not be able to use them in this part of the program. 😥
# Import from pygame import pygame from pygame.locals import * #Import game constants and classes from Constants import * |
This is where it gets a little tricky, but we'll try to keep it simple. If you want to go into more details, you can check out other more developed tutorials like the one in C++ from our friend Gondulzak! 😉
So, we're going to create a class named Player.
But what is a class ? 😮
According to the official Python docs :
" Classes are a way to bring together data and functionality. Creating a new class creates a new type of object and so new instances of that type can be constructed. Each instance can have its own attributes, which define its state. An instance can also have methods (defined by the instance's class) to modify its state." Read more.
This is an essential component of object-oriented programming. To try to simplify as much as possible, we will create an object / class Player: which will contain everything that is necessary for the creation and management of our player. From our main(), we will just have to call it, and all the code necessary for the player as well as its variables will be contained in it. This is very practical, because we can easily reuse a class from one project to another without having to rewrite everything. 😉
class Player : """Class allowing to create a character""" |
For now, our class will only contain one method : def which is the basic function that allows the object to be created (that's why we have self , because it creates itself 😉).
Inside, we will first load the spritesheet of our hero, which we will be saved in the sprite variable . Note that convert_alpha allows us to manage the transparency of our image so as not to have a black background behind Rabidja 😜.
We then define the x and y coordinates of our player. Here, we will display it at (0,0) or the top left of the screen (Ah, yes, because with the SDL the starting point of the orthonormal reference is at the top left, it can be a little confusing at first, when you are used to maths... 😵)
And finally, we give a starting direction to our sprite so that it is displayed to the RIGHT (not really useful here yet... 🙃)
def __init__ ( self ): # Load the sprite file self.sprite = pygame.image.load(SPRITE_PLAYER).convert_alpha() # Sprite coordinates self.x = 0 self.y = 0 # Sprite direction self.direction = RIGHT |
There you go! Now, if you click on the green arrow at the top of Edupython with the Main.py file open ( otherwise it will NOT work!!! ), it will launch the program and good old Rabidja will appear with his sprite sheet! 😇
Well that's better, but we're not there yet! 😅 In the next chapter, we'll animate this angry rabbit! 😁
See you soon for the rest! 😄