
 English
  Français
Let's now move on to the third chapter of this tutorial, dedicated to discovering Pygame in Python! 😃
For this new step, we are going to animate our sprite (It will have a much better head...)! 🤩
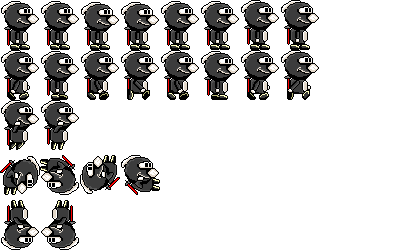
To do this, instead of displaying our entire spritesheet: "rabidja.png" (which always remains in the "graphics" folder ), we will cut it into rectangles, called frames , and we will then scroll these frames with a counter (timer) like for a real cartoon! 😎
rabidja.png
So, if we look at our spritesheet, we notice that the drawings were not arranged hazardly. We thus find 5 lines, each corresponding to a different animation ☺️ :
- The first one corresponds to the Idle state, that is to say when Rabidja does nothing. We notice that there are 8 frames that are looped (but the spritesheet is 10 frames long, so 2 are empty).
- The second one is similar but corresponds to the walking state.
- The third one corresponds to jumping and is limited to 2 frames.
- The fourth one that we will not use in this tutorial (but that you will find in the Big Tuto SDL 2 / SFML 2) corresponds to the double jump.
- The fifth one will not be used here either and corresponds to the death. (Oh no! 😱).
The technique will therefore be to cut our sheet into rectangles of 50 x 40 pixels (the size of our sprite) with a very basic mathematical formula:
x = Frame number x PLAYER_WIDTH (= sprite width or 40 pixels)
y = Player state (Idle/walk/jump) x PLAYER_HEIGTH (= sprite height or 50 pixels).
So, if we are Idle, y will be worth 0 (0 x 50), if we walk, y will be worth 50 (1 x 50), and if we jump, y will be worth 100 (2 x 50) since we will have given the values 0, 1 and 2 to the constants Idle, walk and jump.
For the frame, it's the same with x, where we will multiply the value of the frame by the width of the sprite.
So, frame 0, x = 0, frame 1, x = 40, frame 2, x = 2 x 40 = 80 and so on. You just have to be careful with the jump which is limited to two frames (but we'll see that later! 😋).
Now that we have the theory, let's move on to practice! 😅
We will resume the previous project.
Remember that each time you want to compile and launch the program with the green arrow, you must do it in the main, otherwise nothing will happen!!! 😨
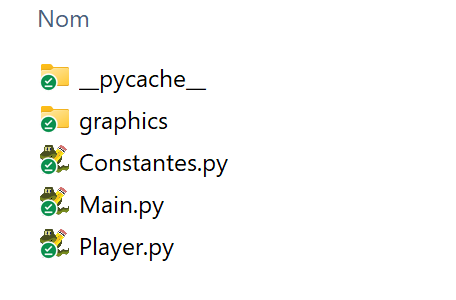
Now let's move on to updating the source code of the Constants.py file ! 🤪
As usual, copy/edit the passages that are not grayed out . 😆
File: Constants.py
# Created by Jay81, on 06/16/2024 in Python 3.7 """Game constants""" # Window settings WIDTH = 640 HEIGHT = 360 # Window customization TITLE = "Rabidja" ICON = "" # List of game images (graphics) BACKGROUND = "graphics/background.png" SPRITE_JOUEUR = "graphics/rabidja.png" # Player sprite size PLAYER_HEIGTH = 50 PLAYER_WIDTH = 40 # State machine RIGHT = 1 LEFT = 2 IDLE = 0 WALK = 1 JUMP = 2 DOUBLEJUMP = 3 DEAD = 4 # Timer for animation TIMER = 4 |
Well, there's nothing really complicated about these constants. We start by entering the size of our sprite (like that, if we change it to Rogue the Super Frog 👽, we won't have to change these values in ALL the code 😜), and then we update our state machine, as we theorized above (we will also enter death and double jump , in case we would like to continue this tutorial later 😉).
Finally, we enter a countdown (timer) for our animation. We will wait 4 fps / 60 (images per second) before changing frames. You can have fun changing the value of this timer later to speed up or slow down the speed of the animation. 😎
Now let's move on to the Main (main program). Same, copy/edit the passages that are not grayed out . 😀
File: Main.py
# Created by Jay81, on 06/16/2024 in Python 3.7 # Import from pygame import pygame rom pygame.locals import * #Import game constants and classes from Constants import * from Player import * #Initializing pygame pygame.init() clock = pygame.time.Clock() # Open the game window in 640 x 360 pixel resolution window = pygame.display.set_mode((WIDTH, HEIGHT)) #Title pygame.display.set_caption(TITLE) #Loading the wallpaper (background) background = pygame.image.load(BACKGROUND).convert() #Player Creation player = Player() # Main game loop continues = True while continues : # We test the events for event in pygame.event.get(): # If we press quit, we close the game if event. type == QUIT: continues = False # Display the background |
Now let's look at the additions to the code. 😉
First, we will create a clock using pygame. This will allow us to manage the number of frames per second so that our game does not run too fast or too slowly. 🤪
clock = pygame.time.Clock()
|
Then, in our infinite loop , we will make two new calls to our Player() class asking it to update the animation of our player (update()) and then to draw it (draw()). We will see the implementation of these two methods when we update the Player.py file . 😉
    # We update the player
    player.update()

    # We display the sprite
    player.draw(window)
|
Finally, at the end of each loop, we call our clock defined above, to limit ourselves to 60 fps (frames or images per second). As you can see, it's very simple because Pygame manages all the code for us! 😇
clock.tick( 60 ) # limits FPS to 60
|
And there you have it! Now let's move on to the heart of the matter, where we'll find the most changes: Player.py. Again, copy/edit the passages that aren't grayed out . 😀
File: Player.py
# Created by Jay81, on 06/16/2024 in Python 3.7 # Import from pygame import pygame from pygame.locals import * #Import game constants and classes from Constants import * """Class for creating a character""" class Player : def __init__ ( self ): # Load the sprite file self.sprite = pygame.image.load(SPRITE_PLAYER).convert_alpha() # Sprite coordinates self.x = 0 self.y = HEIGTH - PLAYER_HEIGTH - 40 # Sprite direction self.direction = RIGHT # Animation self.frame = 0 self.timer = TIMER self.state = IDLE self.maxframes = 7 # Sprite update def update ( self ): # We manage the timer (countdown to scroll the animation) if self.timer < 0 : if self.frame < self.maxframes: self.frame += 1 else : self.frame = 0 self.timer = TIMER else : self.timer -= 1 # We draw the player sprite def draw (self, surface): surface.blit(self.sprite, (self.x, self.y), |
Now let's analyze these additions in more details! 🤓
First, we're going to change the y coordinate where we're going to display/blit our evil rabbit! 👺 Indeed, we had put 0 before, but there, it would end up in the sky, which is not great... 😿
So, we're going to blit it on the ground by adding to it the HEIGHT of the window minus the height of our character, minus another 40 pixels . Of course, this value was defined to stick to our background / wallpaper and you can change it to test . 😁
self.y = HEIGTH - PLAYER_HEIGTH - 40 |
Next, we're going to set up the variables to animate our sprite, like in our theory above. We're going to create the variable frame to know which frame (image) we should display. We're also going to create maxframes and give it the value 7 , like that, starting from 0 , we limit ourselves to 8 frames (yes, yes, if you count from 0 to 7, that's 8, you can test on your fingers! 🤣). Then, we create our countdown / timer to know when to change frames and finally we give the value Idle to our state variable, because by default, our character will start by being static and looking to the right (like in most video games... 😜)
# Animation self.frame = 0 self.timer = TIMER self.state = IDLE self.maxframes = 7 |
Now, it's going to get (a little bit) complicated. 😅
We're going to create an update() function that will update our character's animation. Later, it will also be able to manage its movements, but we'll see that in the next chapter 😜.
Basically, the idea is that at each loop, we will remove 1 from our timer (which is initially worth 4, but you can change it in the Constants 🙂). We then test to see if it is worth 0 or less. In this case, the countdown is over and we increase our frame UNLESS it is at the max frame (7). If this is the case, we then return to frame 0. In all cases, we reset our timer and we start again for a round!
Normally it should run like clockwork. 🤩
# Sprite update def update ( self ): # We manage the timer (countdown to scroll the animation) if self.timer < 0 : if self.frame < self.maxframes: self.frame += 1 else : self.frame = 0 self.timer = TIMER else : self.timer -= 1 |
There you go, all we have to do now is display our sprite at the right coordinates, as in the theory seen above (it's the same calculation but in Python language). ☺️
# We draw the player sprite def draw (self, surface): surface.blit(self.sprite, (self.x, self.y), |
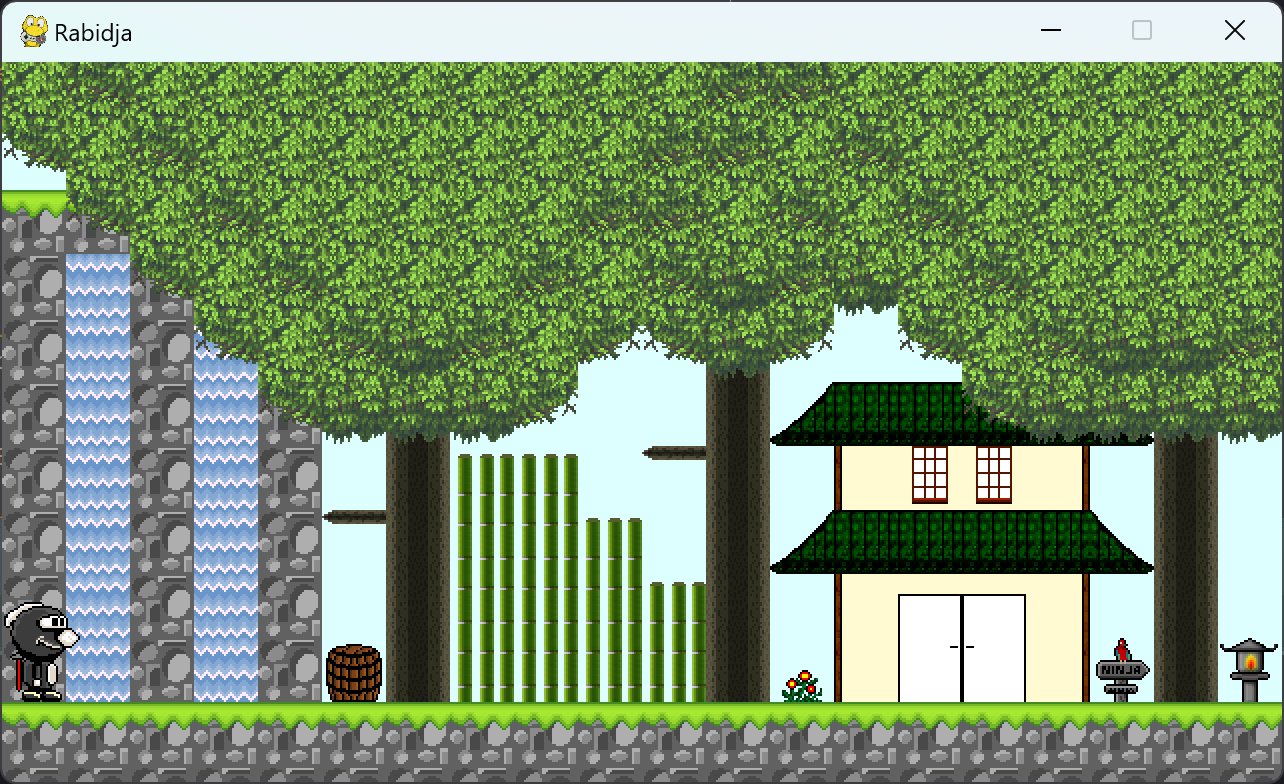
And there you have it, if you press the green arrow in the Main.py file , you will now see Rabidja animate before your amazed eyes! You can play with the timer speed and the sprite blit coordinates to test a little more. ☺️
See you soon for chapter 4! 😄